Chicken and Pearl Barley Casserole
A recent cupboard audit unearthed a number of long-forgotten ingredients, including pearl barley which we used in a risotto last year. I don’t have very fond memories of it which probably explains why the rest of the bag has languished in our “pantry” (or, very small cupboard) ever since.
Not wanting to throw it away, I decided to combine it with the chicken I recently butchered and make a casserole. Sadly however, I don’t think I’ll have very fond memories of this either. Despite the flavour of the casserole being good, I can’t get past the rubbery texture of the barley. Stephen enjoyed it though and, although I persevered for a while, I gave up in the end and had cheese on toast instead.
I’d already made a note of the recipe before I tasted it so I’ve included it below, I doubt I’ll make it again though but perhaps my mum might need some instruction on how to use up the rest of the bag of barley I intend to pass on to her next time I see her.
Chicken and Barley Casserole
Serves Two
Chicken pieces with bones (we used two thighs and two legs)
3 tablespoons flour (2 tablespoons to be mixed with the salt and pepper to make the seasoned flour, 1 tablespoon to be stirred in before the chicken is returned to the pan)
Salt and pepper
Oil
1 medium onion, finely chopped
2 garlic cloves, crushed
1 carrot, diced
2 sprigs rosemary, chopped
Bay leaf
250ml chicken stock
75ml vermouth (or white wine, if you have it. I had it but wanted to drink it)
150g barley
Button mushrooms (I had half a packet of these left over from Saturday’s pie)
Coat the chicken in the seasoned flour. Heat the oil and brown chicken on all sides – about 10 minutes.
Remove the chicken to a clean plate and add more oil to the pan if necessary.
Add the onions, celery, carrot, garlic and bay leaf and cook slowly until soft – about 10 minutes.
Add the herbs and cook for two minutes.
Stir in the excess flour and cook out for a couple of minutes. Return the chicken to the pan, deglaze with the vermouth and add the stock, the barley and the mushrooms.
Season, bring to the boil, reduce the heat and cook for one.
Check for seasoning and serve.


Chana Dal
Having worked our way through many of Madhur Jaffrey’s recipes, the arrival of Camelia Panjabi’s “50 Great Curries of India” was well-timed. We’re currently employing a one-in-one-out policy when it comes to cookery books and since I find it so difficult to part with any books at all, especially cookery books, we haven’t bought anything new for a while.
Additionally, we tend to find a lot of inspiration and recipes online so the purchase of yet more books we don’t really use seems doubly futile. This book was leant to us by a friend of Stephen’s and as I read through the opening chapters in bed one night last week, I remembered just how much more pleasurable it is to read through a book than open a web browser.
The introductory sections of this book are very detailed and give both a history of regional Indian cooking and a useful guide on how to put together a curry; what I’ve found most useful so far is the information on how to select spices for their flavour and/or aroma and for their colour. Also interesting is the importance of cooking spices for varying amounts of time, a distinctly different approach to my “throw-it-all-in style.
As I read, I remembered the bag of chana dal sitting unopened in our cupboard and made a mental note to cook it at some point soon. Feeling a little delicate after Octopus-gate, the meat-free nature of this dish was instantly appealing so I got on with it early this morning giving it plenty of time for the flavours to develop before we ate it.
What surprised me most about this was just how much flavour there was given the relatively short ingredient list. Obviously, some of those ingredients have strong flavours but I’ve struggled at times to produce an Indian dish that’s rounded and deep in flavour, which this definitely was. I may just have to have another look at those book shelves and see if there is anything I can part with to make way for this book.
Chana Dal
Serves Two
250g chana dal
Salt
2 garlic cloves, chopped
1cm piece of ginger, chopped
2 green chillies, chopped
1 bay leaf (or cinnamon leaf if you can get it)
1/2 teaspoon cumin seeds
3/4 teaspoon red chilli powder
1/2 teaspoon turmeric
1 tomato, chopped
Pinch of asofoetida
1 tablespoon chopped coriander
Wash the dal and soak for 20 minutes. Drain and add to a saucepan with 500ml water, cook for 20 minutes.
Sautee the garlic, ginger, chilli and bay leaf for two minutes. Add the cumin, chilli powder and turmeric and stir well. Add the tomato and continue to stir for a further two minutes.
Add this mixture to the dal and add the asofoetida. Bring to the boil and cook until the grains are soft but retain some shape (about 1 hour). Add the coriander and serve.


The Octopus
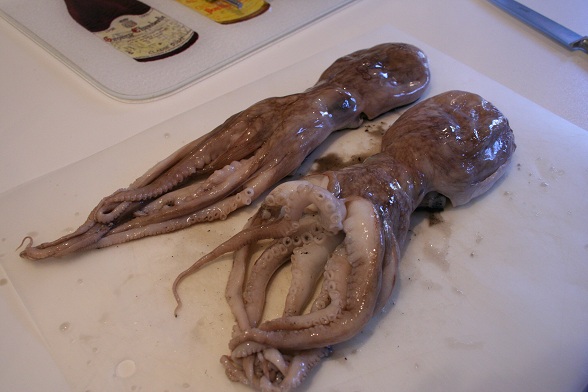
There’s been a sense of unease in our little flat today. We slept well, had a good breakfast and completed all our boring domestic tasks early. The sun is shining and the day was ours to do with as we pleased so the little black cloud following us aroung puzzled me until my mind turned to dinner plans. The octopus. Two octupuses in fact, whole ones, squashed into our tiny freezer tenderising as we cleaned the oven and swept the floor around it.
We ate a brilliant octopus stew at a friend’s place just after Christmas and quickly resolved to do something similar at home, just as soon as we could find the necessary creatures. Finding them wasn’t a problem but there just didn’t seem to be any time. Until yesterday when we made the trip to the fish market, handed over our £4.50 and came home to research recipes. Yes, a little backwards and the reason the octopuses went into the freezer and we had pie last night instead. They need to be tenderised and one of the best ways to do that is via the freezer.
Having just been on a butchery course, I was confident that I could handle the cleaning and portioning until I did some reading. Firstly, there was talk of beaks which resulted in a full body shudder (I don’t really like birds or anything flappy) and then other horrible words (slime, for example) started to appear which further compounded my squeamishness.
It turns out that Stephen, having recently dealt with a couple of whole squids, was feeling similarly anxious about the prospect of turning our cephalopod into something resembling dinner, hence the dark mood spoiling our Sunday.
It seemed to me that the best way to deal with this slippery situation was just to get on with it and start hacking away but, of course, the creatures were frozen and in no state for butchery. Stephen threw them into some cold water to speed up the process while we took our mind off things by cleaning the windows (the presence of octopus in the kitchen is a great way to get through those little jobs you’ve been putting off).
And then it was time. We donned our aprons and with a glass of wine in one hand and a freshly-sharpened knife in the other, we got down to business. Since there were two, we decided we would handle one each. Stephen, ever the gentleman, went first and it soon became apparent that our squeamishness wasn’t for nothing. The tentacles were easy to remove but as soon as he reached the head (and, horror, the beak) the previously mentioned slime was everywhere and made the slippery little suckers somewhat difficult to handle. After turning the body inside out* he removed the guts and gave everything a good clean.
Then it was my turn. Having watched Stephen, I managed to avoid puncturing the guts as he had done and so there was less slime this time. I did inadvertantly squish an eye though which wasn’t particularly pleasant and made me very grateful for my 79p Ikea rubber gloves. Things went rather more swimmingly after that though and, after 24 hours of anxiety, we were in posession of two portioned octopuses ready for the pot.
After a quick pounding with a meat tenderiser, the pieces went into a pot of boiling water for an hour to tenderise further. And then we were on rather more familiar ground, softening onions and frying herbs to form the basis of the stew.
And the result? It was OK but not mind-blowing. The octopus itself was beautifully tender but we overdid it with the tomatoes which meant we couldn’t taste much else. More wine was required too and perhaps adding the liquor we used to tenderise the octopus with would help too.
Octopus Stew
Serves Two
2 octopuses
Oil, for frying
1 onion, finely chopped
1 red pepper, finely chopped
2 cloves garlic, crushed
Tablespoon tomato puree
Glass of red wine
500ml stock
Bunch of parsley, finely chopped
1/2 bunch oregano, finely chopped
Salt and pepper
1 potato, diced
If your octopus isn’t frozen, then freeze it. Wr froze ours for 24 hours but online guidance suggests 48 hours is preferable.
Once frozen, joint the octopus and boil it for 1 hour. We added onion and a bay leaf to the water.
Drain and reserve the water. Once cool, chop the octopus into small pieces and tenderise with a meat tenderiser.
Soften the onion, pepper and garlic in some oil. Add the tomato puree and allow to caramelise.
Deglaze the pan with some red wine and allow the alcohol to cook out. Add the rest of the ingredients, bring to the boil and then simmer for 1.5 hours.
*If you want to see what an inside-out octopus looks like then there are more pictures on our Flickr stream.


Beef and Oyster Pie
This week is British Pie Week and with not a lot planned for dinner this weekend, we were grateful for the suggestion. This was actually supposed to be tomorrow’s lunch but we ended up swapping things around since tonight’s planned dish needed to spend some time in the freezer to tenderise, more on that tomorrow.
We considered various different fillings for our pie but eventually settled on beef and oyster since it’s been on our “to cook” list for some time. In the 1800s oysters were traditionally used in pies since they were cheap, plentiful and were a good way to add flavour and it’s something that’s always intrigued us. We had originally planned to use red wine but since we were making something typically British, changed our mind at the last minutes and opted for stout instead.
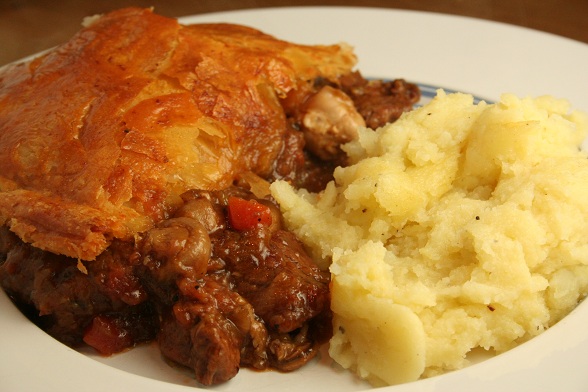
The stout added a distinctive bitter note to the pie that was slightly tempered by the sweetness of the carrots, we both agreed that we would have preferred the flavour of red wine though. The oysters had a pleasant, silky texture but didn’t add much in the way of flavour. Having not cooked with oysters before, we left out the juice, fearing it would make everything too salty but, in hindsight, this would have added an extra dimension.
Beef and Oyster Pie
Serves Two
Vegetable oil, for frying
Flour, for frying
500g braising steak
1 large onion, sliced
1 leek, sliced
2 cloves garlic, crushed
1 carrot, diced
1 stick celery, diced
250g button mushrooms
Bay leaf
4 stalks thyme
Tablespoon tomato puree
Salt and pepper
150ml stout
150ml beef stock
Tablespoon worcester sauce
8 oysters
Puff pastry
Start by tossing the beef in seasoned flour. Shake off the excess and brown the meat in batches. Remove to a plate and reserve.
In the same pan, soften the onion, leek, garlic, carrot and celery in some oil. Remove to a plate and reserve.
In the same pan, soften the mushrooms.
Return the meat and the vegetables to the pan and add the thyme and bay leaf. Add the tomato puree and season, cook for two minutes.
Add the stout and allow the alcohol to cook out. Next, add the stock and the worcester sauce and bring to the boil. Reduce the heat and allow to simmer for 1.5 hours.
If the liquid hasn’t reduced, remove the meat and vegetables and boil hard until there is just enough liquid to coat the meat.
Transfer the contents to a pie dish, (leaving to cool first will prevent the pastry from becoming soggy), add the oysters and top with the pastry. Cook until browned, about 25 minutes.


Brilliant Pizza
We have been making pizza on and off for a few years now, with varying levels of success. There were a couple of times when we did pretty well and thought we had definitely cracked it, but haven’t been able to keep it consistent. With our old not very hot oven we had a clever ploy to make it hotter by heating it up with the grill for a long time and that worked well, but we have a new oven now which is hotter and better for pizza so don’t need to do that. Inspired by a recent visit to a Pizza Express pizza-making masterclass, we decided to try again. We had two main aims: 1) nice thin, crisp base and 2) interesting toppings.
At the masterclass, one of the pizzas that was demonstrated to us had spicy sausage and salami on it when it was cooked and then afterwards had bits of fresh mozarella put onto it, along with what we thought was particularly interesting – watercress dressed in pesto. We were keen to do something similar and bought some watercress, but when we opened the bag it was rather squashed so gave it a skip and dressed the mozarella in the pesto instead, which turned out rather well.
We had success with our dough which turned out very stretchy and made it possible to make a nice thin base without it breaking. I had always thought it was cheating to use a rolling pin, but at the masterclass we had used one so did it at home too and it does work very well, so we’ll definitely continue to do so. We had some really nice salami which we put onto it – it can feel like a waste to put good salami on pizza, but this had a wonderful deep, slightly earthy taste to it and crisped nicely.
We added most of the pesto-marinated mozarella (British buffalo mozarella from Laverstoke Park) to the pizza before cooking and kept some of it for topping afterwards too. We made a quick tomato sauce from a tin of tomatoes, some garlic and oregano. After cooking for a short while, we put it into a sieve to allow some of the liquid to drain away – we’ve found that in the past our pizzas often end up soggy and figured it was probably from our sauce being too wet. The liquid that drained away tasted like delicious garlicky tomato soup, maybe we should have planned to have that as a starter!
So after we had rolled out the pizza and tossed it around a bit while trying not to completely cover the kitchen in flour, we topped it with some of the drained tomato sauce, some sliced salami, some pesto-marinated mozarella and a sprinkle of lovely fragrant dried oregano. Into the oven at 270C for as long as it took to look like it was done and then topped with a little more mozarella and served. Delicious.
The pesto worked very well on the pizza – its nutty, herby oiliness combined well with the sweet acidity of the tomato sauce topping. The salami was delicious – Kerri liked the taste but not the crispness, whereas I thought it was wonderfully crispy like the best bacon in the world should be. The base was thin and crispy too and not soggy in the middle like it sometimes is. Brilliant Friday night dinner… we’re sure that’s not just the prosecco talking! And as we had made two bases but only one pizza (we had loads of nuts and olives as a starter) there is another base to make pizza for lunch on Saturday.
Because this was the best pizza yet (again), here is the recipe for the dough in case we forget:
6g dried yeast
1tsp caster sugar
1tbsp olive oil
160ml warm (but not hot) water
1tsp salt
250g extra strong white / “OO” flour
Mix the yeast, sugar and olive oil into the water in a small bowl, cover with a wet tea towel and place in a warm place for 10 to 15 minutes until foam starts to form on top. We put ours into the oven for this and turned it on very low – 50C – for a while then turned it off again.
When the yeast has grown and foamed up, put the flour and salt into a large bowl and pour in the yeast mixture. Mix together to form dough and knead by hand or with a dough hook (we did a bit of both here) for 5 to 10 minutes until the dough has become a bit stretchy. Removed it from the bowl, lightly oil the bottom of the bowl, form the dough into a ball and put it into the bowl. Cover with the wet tea towel and leave it for half an hour to an hour in a warm place (back into the oven on 50C again for us) to rise.
Then break the ball in half, form into two separate balls, dust with flour and roll out into a circle, then toss it a bit with some flour so that you don’t feel like you cheated with the rolling pin.
That’s the hard bit. The easy bit is: Put a pizza stone into your oven and preheat to as high as it will go. When the oven is hot, take the stone out (carefully!) and place your rolled out pizza base onto it (carefully!). Top with a selection of interesting toppings and put back into the oven. Then sit and watch it through the window until it looks done. Then take it out, cut it and eat it, trying not to burn your mouth of course. Then discuss how it’s the best pizza in the world and from now on all pizzas will be this good.


Beef baked with Yoghurt and Black Pepper
I might have mentioned that we have quite a lot of meat to get through this week. A combination of having a freezer the size of a shoe-box and wanting to use as much of the meat while it’s at it’s best (i.e. unfrozen) meant that tonight we opted to use the oxtail – try as I might, there was no way I was going to cram that in to the freezer amongst the frozen peas and fishfingers.
Looking back through the archives, I saw that the last time we (well, Stephen actually) cooked oxtail was in a brilliant Thai-style soup. The next stop was obviously Indian-style so out came Madhur Jaffrey. I briefly considered rogan josh but that was far too complicated for a school night, this was the next best thing.
The original recipe calls for diced stewing beef so I adapted the cooking time to take into account the long, slow braising that oxtail requires and ended up cooking this for a total of 4.5 hours (over two nights). While the end result was reasonably tender meat, I think it would have benefited from an even longer cooking time.
Stephen said he enjoyed it but I could detect a bitter note which I found off-putting. While this was simpler than the rogan josh, it still required a fair amount of browning and simmering and cooking and reducing and I was a bit fed up with the whole thing by the time it came to eat it anyway. It’s a good job Stephen didn’t feel the same way because there’s plenty left over and, with no space in the freezer, it’s the same again tomorrow night.
Beef baked with Yoghurt and Black Pepper
Serves Four
Vegetable oil (for browning)
1 oxtail, jointed (extra points if you do this yourself)
3 onions, chopped (MJ always specifies onions in grams which I find infuriating, this looked about right)
6 cloves garlic, peeled and chopped
1/2 teaspoon powdered ginger (I used fresh, about an inch)
1/2 teaspoon cayenne pepper
1 tablespoon paprika
2 teaspoons salt
1/2 teaspoon black pepper
300ml natural yoghurt
Start by browning the meat and then removing to a plate.
In the same pan, cook the onions, garlic and ginger until brown – about 10 minutes.
Add the spices and stir to incorporate, return the meat to the pan, add the yoghurt and stir.
Cover with a lid and transfer to the oven for 2.5 hours.
(I did all of this on Monday night and then left it to cool overnight. The following night, I brought it back to the boil on the hob, added some water to ensure the meat was covered and simmered for a further 2 hours. At this point, I took the meat off the bone and returned it to the sauce. An extra hour of cooking here would have helped tenderise the meat).


Roast Sirloin of Beef
So, with two carrier bags of meat to get through, it was obvious that today was going to be all about the roast beef. On the butchers block yesterday, the beef sirloin certainly looked impressive but it was only when I unwrapped it in the privacy of my own kitchen that I realised just how enormous it was. Stephen and I both have a decent appetite, especially when it comes to roast lunches but it was quickly apparent that there was no way we were going to be able to eat the whole joint without wasting any. The answer however was obvious: slice off two steaks and put them aside for future enjoyment.
Not wanting to risk over-cooking such a beautiful piece of meat, we brought Hugh to the breakfast table and read up on his tips for perfect roast beef. He recommended roasting on a high temperature for 20 to 30 minutes before lowering to 180 degrees and cooking the meat for 9-10 minutes per 500g for very rare and 12-15 minutes for medium. We opted for 11 minutes to be somewhere in between.
Happily, this worked out perfectly and after an hour of cooking and 30 minutes of resting, we were sitting down to the best beef we’ve ever cooked. Not only was it tender and melt-in-the-mouth, it had a strong, deep flavour that required very little in the way of seasoning or accompaniment.
To be honest, we probably could have taken off four steaks and still had plenty for lunch and leftovers but this way, we have enough for plenty of sandwiches which is not a bad way to start the week.


Butchery Masterclass at Allens of Mayfair
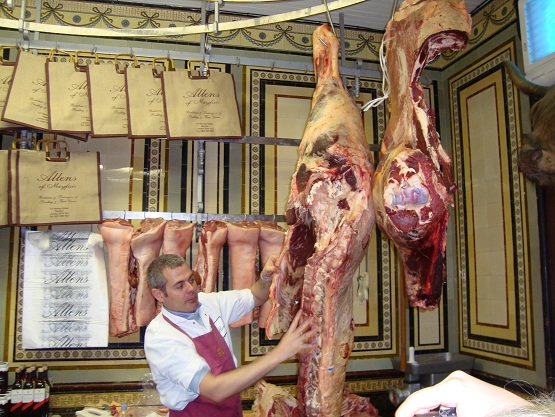
Allens of Mayfair is the oldest butcher’s shop in London having proudly occupied the same site for the last 120 years. The history of the building is evident as soon as you approach the shop but once inside, it’s immediately obvious that this is no backwards-looking kind of establishment.
What’s most striking are the carcasses proudly hanging up in the middle of the shop, ready for butchering. It’s nothing like the sterile atmosphere of the local supermarket, not only can you see the meat but you can smell it too. And it smells good. A little challenging on a Saturday morning, particularly if you’ve over-indulged the night before but a good indication of what was to follow.
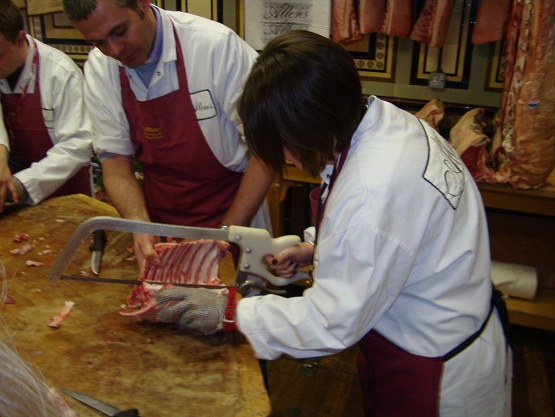
I was lucky enough to be there for one of their butchery classes, held in the middle of the shop around the impressive butcher’s block. While I knew I would be getting my hands dirty, I wasn’t sure exactly what I would be butchering since this is dependant on what’s in season and what’s available. David, the co-owner, explained that today’s selection was chicken, lamb and beef.
We started with the chicken, probably because it was the easiest. Except it wasn’t and I soon realised that there’s a reason Stephen deals with the butchery in our kitchen. David and his colleagues were on hand to help though and I eventually managed to do a reasonable job, although there was definitely more meat left on my carcass than there should have been.
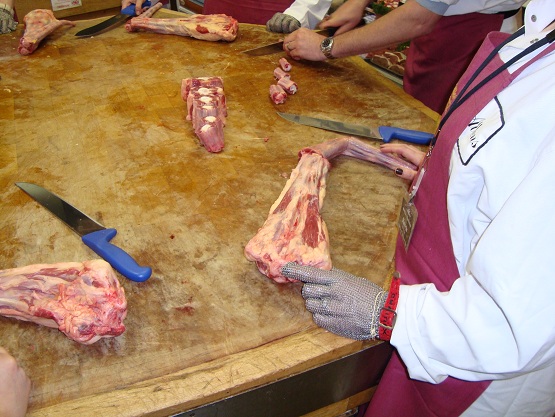
Luckily for me, David and his colleagues were more than happy to continue helping me as I attempted to portion a whole oxtail, French trim a rack of lamb (which involves both a saw and a cleaver) and de-bone a beef sirloin. It wasn’t easy but it was most definitely rewarding and by the end of the class I felt reasonably confident in my ability.
Aside from the butchery, it quickly became apparent just how much skill is involved in the production of something like a rack of lamb. Sure, I’ve trimmed a half-rack and cleaned bones at home before but have never given much thought to what’s involved in the steps before (the sawing and the cleavering is what I’m talking about here!). Allens supply many of London’s finest restaurants and part of the aim behind the course is to leave people with an understanding of what’s involved in getting their restaurant steak to the table.
At £100, it’s not cheap but it’s a great way to spend a Saturday afternoon and you get to take all that meat home with you too. Yep, I struggled to the tube with a whole chicken, an oxtail, a rack of lamb and that impressive beef sirloin compete with bones to turn into stock. It’s going to be a meaty week!


Celeriac and Potato Soup
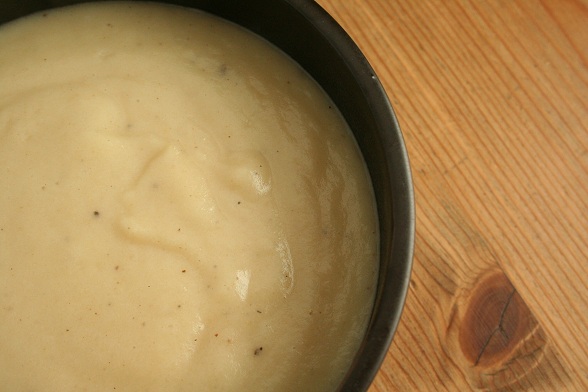
After the success of the Jerusalem artichoke soup, I thought I’d try my luck with some celeriac that was lurking at the bottom of the fridge. I basically followed the previous recipe and just substituted the artichokes for celeriac and it worked well. Not a complete triumph, there’s still something missing (possibly just more mascarpone) but it wasn’t as disastrous as some of my previous attempts.
Apologies for the boring picture: in my head it was interesting and tonal but I can see now it’s actually just very beige. I should also apologise for the boring post, there are some more interesting things to come just as soon as I have the time to write them up.


Spaghetti Carbonara
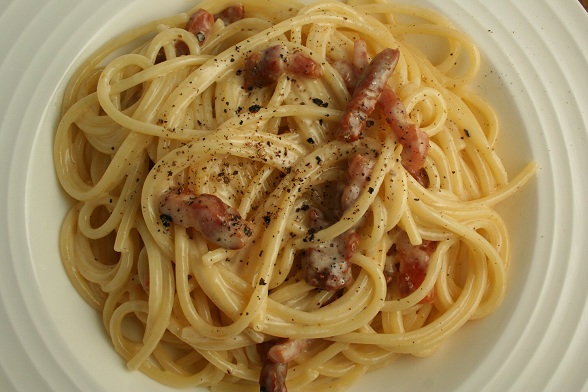
Mmmm bacon. I arrived home this evening to the delicious smell of bacon frying; Kerri was making spaghetti carbonara, which was most welcome. It was similar to this recipe, but we took a slightly different path by adding some left over marscapone instead of cream. The result was delicious and the photograph much more appetising!


