6 Comments to 'Chicken Kiev'
Subscribe to comments with RSS or TrackBack to 'Chicken Kiev'.
:: Trackbacks/Pingbacks ::
No Trackbacks/Pingbacks
Leave a Reply
You must be logged in to post a comment.

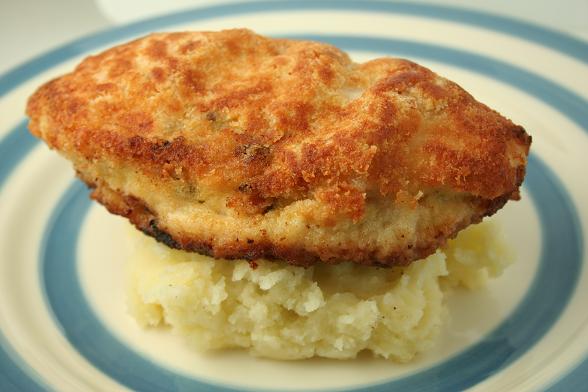
Chicken Kiev has become something of a byword for outdated, retro-but-not-cool food along with prawn cocktail and similar dishes that were once considered the height of fashion but have since fallen from grace. It’s a shame really, as when they are done well, they can be very good. I used to like chicken kiev when I was younger, but I’m sure that most of the ones that I ate were frozen, reconstituted-chicken versions that I shudder at the thought of eating now.
However all is not lost, since with a decent recipe, some good ingredients and a measure of determination, it is of course perfectly possible to create a really good chicken kiev the way it should be. (After all that ranting, for those who don’t know what chicken kiev is, it is a breaded chicken breast stuffed with a herb-and-garlic butter.)
This is a somewhat adapted recipe… the one that we originally found specified tarragon but we didn’t have that so we used parsely instead.
Ingredients:
2 large chicken breasts (you need to cut a pocket into them, which is difficult if they are small)
1 egg, beaten
plain flour
bread crumbs
oil for frying
salt and pepper
For the butter:
2 small to medium garlic cloves, crushed
juice of half a lemon
a tablespoon of so of finely chopped parsely (if you are using tarragon which is stronger, use less)
125g butter
salt and pepper
Method:
Pre-heat your oven to 180C. Leave the butter to soften a bit if it has been in the fridge. I put ours in the oven for a bit and left it in for too long and it started to melt and then had to cool it down for it to harden up again. So don’t do that. Mix in the garlic, parsely, lemon juice and season with salt and pepper. Stir it together well.
If your chicken breasts have skin on them, remove it. Carefully cut a slit into the side of the chicken breasts and create a little pocket inside them. Stuff these pockets with as much of the butter as you can. Fold the skin back over and if it’s not quite holding together, secure with a toothpick.
Season the flour with salt and pepper, then coat the stuffed chicken breasts in it. Then coat them in the beaten egg mixture and finally coat them with the breadcrumbs. Heat up a little oil in a frying pan and brown the breaded chicken breasts on both sides. If the frying pan is oven-proof them pop it straight into the oven. If not, then put them onto a baking tray (make sure it has highish sides though as butter may melt out and spill otherwise).
After 20 to 25 minutes, they should be golden on the outside, cooked through and lovely and buttery and garlicky on the inside. A lot of the butter cooked out of ours; we’re coming up with ways to prevent that happening in the future.  And of course beware of the toothpicks when eating!
We served ours with some mashed potato and broccoli and it didn’t matter whether or not they were cool or contemporary because they were delicious.
When I used to make this, I would carefully pound out the chicken breast until they were about 1/4″ thick, then I would put the butter and herbs in a mound, and roll them around it, folding the ends over. If rolled thin enough, no toothpick is required. Chill fold side down for about 30 mins, then bread and fry. The butter should make a pool inside that pours out when you cut into it. Divine.
gaile’s last blog post..Resurfacing…briefly
Like you, I remember having the dodgy reconstituted version when I was a kid. I loved it though! My butcher sells nice fat chicken supremes which I bet would work well for this. Maybe I’ll go for the other 80s ‘classic’- chicken cordon bleu!
Ros’s last blog post..Not Quite Foie Gras Salad
I’ve just put chicken kievs on the menu for next week! I love them but haven’t had one for ages as the shop bought versions can be iffy… Yours look fab though!
Alex’s last blog post..Tartiflette
Gaile thanks, that sounds like a good idea. We saw that in one recipe but weren’t sure of the shape that it would come out in if we did it that way. We’ll definitely try it next time; it would be good to keep more of the butter inside!
Ros I loved the dodgy ones too, I just don’t think I’d like them if I had them now though 🙂
Thanks Alex, good luck if you try them!
Wow this seems great for a special dinner!
Mrs Ergül’s last blog post..February Daring Bakers Challenge – Chocolate Valentino Cake
Oh my god, that last photo just makes my knees go weak! I need a break from this concrete jungle!!!
Mrs Ergül’s last blog post..February Daring Bakers Challenge – Chocolate Valentino Cake