Posted By Kerri

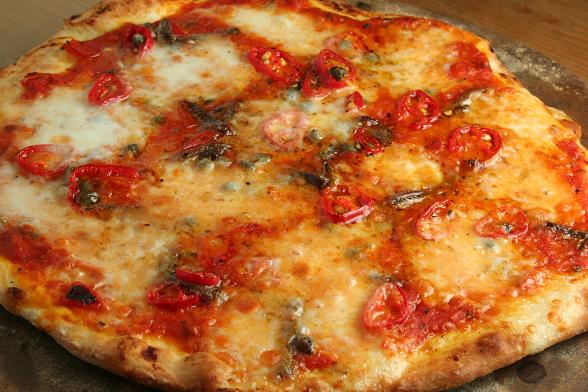
It seems very self-obsessed to call something that you’ve cooked yourself “perfect” but, having spent a fair amount of time getting our recipe just how we wanted it, I think we’ve finally mastered our own version of perfect pizza.
We’ve experimented with different types of dough and have finally settled on Jamie Oliver’s recipe – we do still have some trouble getting it to rise in our draughty kitchen but it doesn’t seem to affect the finished dish.
Our preferred tomato sauce is easier than versions we’ve used before and has just the right balance of richness and sweetness: a simple case of frying some garlic until it begins to colour, adding a tin of good tomatoes and some herbs with a touch of salt and pepper and cooking for just a few minutes.
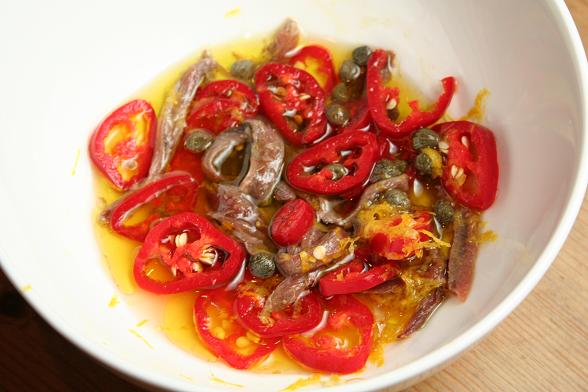
Toppings vary, this one was chilli, anchovies, capers, lemon juice and lemon zest – another Jamie recipe. Salami or cured ham usually feature though, as do olives. Our favourite mozarella comes from Marks and Spencer although there seem to be new brands popping up all the time so this changes depending on where we happen to be shopping.
The real key to perfect pizza though is the cooking method. A pizza stone makes a huge difference, it transmits heat in a way that a regular baking tray doesn’t and is something we’ve used right from the start. A hot oven is crucial too. We thought using the barbecue was the way to go but, after several attempts, we realised we just couldn’t keep the heat in for long enough to create the crunchy base that is so important.Â
The revelation came in the form of Heston Blummenthal, well known for his pursuit of perfection. His method for perfect pizza requires a cast iron frying pan and an oven heated for 20 minutes by the grill. We use his grill method but in conjunction with the pizza stone and it works a treat: if Stephen’s singed hair wasn’t a good enough indicator of just how hot the oven was, our oven thermometer registered an amazing 300 degrees, quite a feat considering the dial only goes to 190.
We still haven’t mastered the black, blistered edges that pizza cooked in wood-fired oven creates but I’m not sure we’re ever going to manage that in a domestic oven. This is as close to perfect as I think we’re going to get but I’m quite happy with “almost-perfect pizza”

Pizza Dough – makes two pizzas (this is originally Jamie Oliver’s recipe for 6-8 pizzas with quantities amended for 2 pizzas and the method altered to allow for a hand mixer)
250g Tipo ‘00’ flour
1 teaspoon sea salt
4g dried yeast
1 teaspoon golden caster sugar
160ml lukewarm water
Sieve the flour and salt into a large mixing bowl. In a jug, mix the yeast, sugar and olive oil into the water and leave for a few minutes (until it starts to bubble slightly) then pour into the bowl. Mix together with a wooden spoon and then knead with a hand blender until you have a smooth, springy dough. Place the ball of dough on a flour-dusted surface and flour the top of it. Cover with cling-film and leave for 15 minutes.
Remove the cling film and knead the dough around a bit to push the air out with your hands, form into bases and top with tomato sauce.
Tomato Sauce
Olive oil, for frying
2 cloves garlic, crushed
Small bunch or oregano or basil
Tin of tomatoes, juice discarded
Salt and pepper
Fry garlic in olive oil until it just begins to colour, add the tomatoes, herbs and salt and pepper and break up the tomatoes. Cook on a low heat for five minutes. Blend if preferred and leave to cool.
Toppings
I don’t think I need to tell you what to put on top, (although I would tell you not to use pineapple, if you asked me) but I would say don’t forget to oil the edges of the dough as it makes a big difference to the all important crunch factor. A final point is, let the pizza cool before you slice or start to eat. Aside from the fact that cheese heated to 300 degrees will remove a layer of skin from your fingers, it will allow everything to set and the base will continue to crisp as it cools down.
Method
Remove all but one shelf from the oven, add the pizza stone and turn the grill on to maximum. Shut the door and leave the oven to heat up for 20 minutes. When you are ready to cook your pizza, remove the stone from the oven, close the door so the oven heats back up, and add the base to the stone*. Add the toppings as quickly as you can and return the stone to the oven, shut the door and leave the pizza to cook until the cheese has melted and the edges of the pizza have coloured. This will probably take about five minutes.
*Ideally, you should assemble the pizza before sliding it on to the stone so that as little heat as possible is lost, we haven’t ever managed this successfully but give it a go if you’re feeling brave.
6 Comments to 'The Quest for Perfect Pizza'
Subscribe to comments with RSS or TrackBack to 'The Quest for Perfect Pizza'.
:: Trackbacks/Pingbacks ::
-
Pingback by Pizza and Garlic Bread in our New Oven! | Dinner Diary - on November 13th, 2009 at 9:17 pm
-
Pingback by Brilliant Pizza | Dinner Diary - on March 6th, 2010 at 10:31 am
-
Pingback by Purple Sprouting Brocolli Pizza | Dinner Diary - on March 20th, 2011 at 6:39 pm
Leave a Reply
You must be logged in to post a comment.

Fantastic looking pizza. We can get our oven as hot as 250oc, but will have to try the grill method to see if we can get it hotter. I also feel we need to invest in a pizza stone.
.-= Jules´s last blog ..Welsh Cheesecakes =-.
I’m really impressed with your dedication to creating the perfect pizza. The photo is really making my mouth water – it certainly looks perfect to me. And I like the sound of the toppings you used for this one – the lemon in particular sounds interesting here.
.-= Antonia´s last blog ..Summer squash and sweetcorn salad =-.
Congratulations. I have to say that it looks fantastic.
.-= gourmet chick´s last blog ..L’Entredgeu (Gourmet Chick in France) =-.