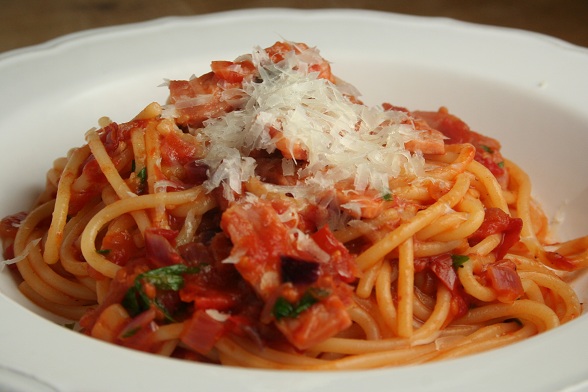
Spaghetti alla Vodka (with bacon)
I started a new job last week and one of the many good things about it is that I get to work from home and therefore save myself an extra two hours a day that I used to spend at the mercy of London Underground. I can also work flexible hours so, in theory, I could start work early and then finish early, giving myself lots of time in the evening to spend in the kitchen. I haven’t quite got myself into a routine yet though so what generally happens is, I finish work and then realise there’s very little food in the house and I have no idea what to cook. I meant to resolve this at the weekend by planning lots of meals that I could start in the morning before work or be ready to prepare when my working day is finished. I didn’t get round to it though, I did however manage to buy vodka which meant we could eat this (original recipe here), never let it be said that I don’t have my priorities in order.
In a happy coincidence, a rather nice man knocked on my door yesterday and presented me with 40 rashers of bacon (more on that later) so I did the only thing I could in that situation, immediately fried some up and added it to the pasta sauce. Of course, everything is better with bacon but this took quite a lot of seasoning and lemon juice before it was properly balanced (Sainsbury’s have stopped selling my favourite San Marzano tomatoes so I tried some tinned cherry tomatoes which weren’t brilliant: too sweet and too much skin) but, once it was balanced, it was a good combination.
Of course, now I not only have to work out what we’re going to eat next week but I also have to work out how to incorporate those 40 rashers of bacon before they expire.


Mexican Breakfast
Having over-catered somewhat on Saturday night, we ended up eating leftovers on both Sunday and Monday. While I’m not a fan of eggs, Stephen loves them so it was with great delight that he topped his leftovers with a fried egg on Monday night. I was out when he took this picture but I’m glad to see he followed the golden rule when it comes to egg shots: always make sure to show the yolk.


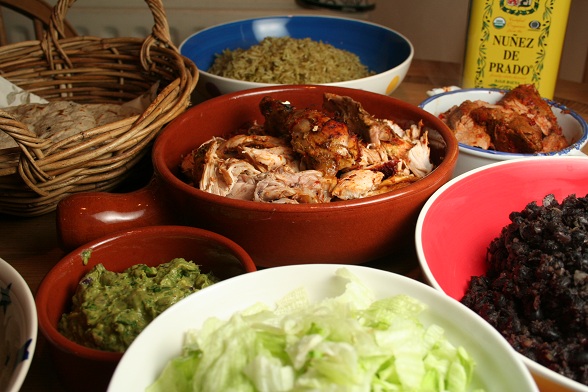
Mexican Style Whole Chicken
We had some friends over for dinner on Saturday night and, after exploring pretty much every cuisine we could think of, we settled on Mexican food. The reason it took us so long to decide is that we wanted to cook Maddhur Jaffrey’s chicken but in a different style. We both thought it would work brilliantly with a Thai twist but our local Thai supermarket is closed and we knew we would struggle to get all the relevant ingredients. So, we went Mexican instead since we had everything we needed.
The original Indian recipe uses yoghurt in the first part of the marinating process but we reasoned that lime juice would do a similar job. With hindsight, I think we should have used yoghurt as the flavours didn’t penetrate the chicken quite as well as they did last time. Aside from that, it all worked out pretty well. The chicken didn’t seem quite as moist as it did last time but it wasn’t too noticeable, some extra marinating juices would have been useful here though.
We also decided to try our luck with a pork fillet which didn’t work so well. Pork shoulder would be very good though due to all that extra fat.
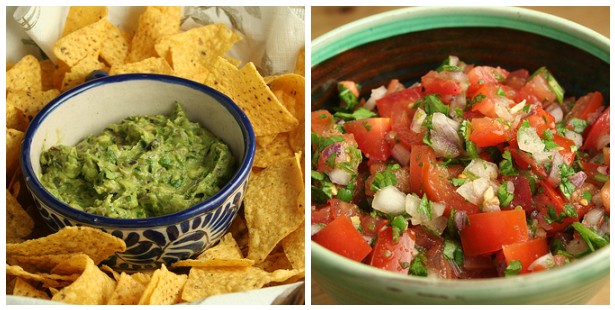
Beans, green rice, tortillas and guacamole completed the meal.
(I’ll post the chicken recipe tomorrow, Stephen did most of the work and I’m not sure what went into the marinade).


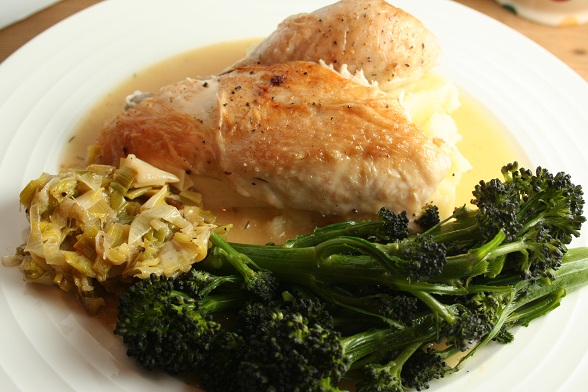
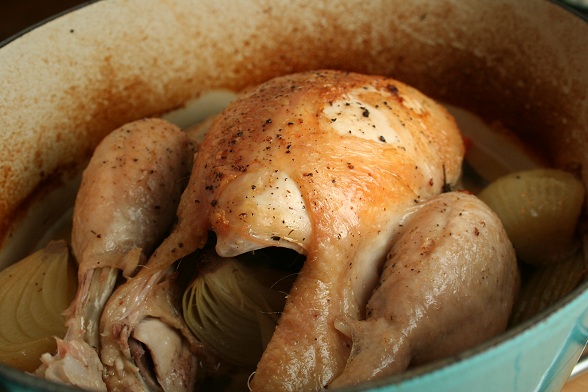
Pot Roasted Chicken with Mustard
Oh dear, another unintentional break in posting due to busy schedules and pre-summer diets. We have of course been eating but none of it has been that interesting unfortunately. There just hasn’t been the time to think about food or spend much time preparing it. And healthy food isn’t really my forte so there’s been a lot of salads with some kind of protein and quite a lot of toast.
This chicken dish was interesting though and was enjoyed at the height of my mustard obsession. Simple pot-roasted chicken with a variety of mustards added to the cooking juices. A good alternative to roast chicken for a Sunday lunch – you don’t get the crispy skin but since it’s not diet-compliant, I can’t have it anyway. The chicken will remain moist even if you forget about it for a little while so it’s also a good alternative if you’re not confident with timings.
Pot Roasted Chicken with Mustard
This doesn’t really require a recipe but the steps are:
Brown the chicken all over
Transfer it to a casserole dish and sit it on top of some onions, carrot, celery and a bay leaf
Add some water and wine
Put the casserole dish into an oven preheated to 180 degrees
Cook for about an hour and a half
Remove the chicken to a plate to rest, cover with foil
Put the casserole dish on the hob
Skim the fat
Add mustard of your choice
Bring to the boil
Reduce the heat and simmer
Check for seasoning and thicken if you wish
Serve


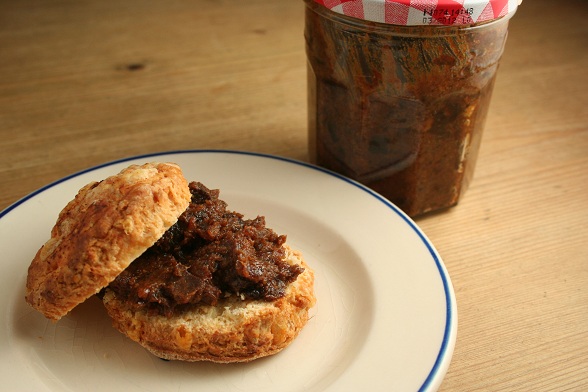
Cheese Scones with Bacon Jam
Yep, BACON jam. Jam, made of BACON. It’s jam but it’s got BACON in it. How great does that sound?
I’ve had variations of this recipe saved for ages since it was doing the rounds of the American food blogs a couple of years ago. It was only during the recent recipe-clearout that I came across it again and, since then, it’s never been far from my thoughts. I originally thought it would be great to serve with a selection of cheeses but then, in a moment of inspiration, it occurred to me that it would be brilliant with cheese scones. And what better way to spend a rainy Saturday than in the kitchen, baking scones and making jam?
I’ve only attempted scones once in recent years and I think it’s fair to say they were a disaster. So much so that I haven’t bothered since. I used to make these particular cheese scones a lot when I was much younger though and they always turned out okay so I felt pretty confident as I started making the dough. I made sure to handle the dough carefully and not over-work it and I worked quickly so as to not expose the mixture to the heat of the kitchen for too long. And they turned out well, if a little browner than I would have liked on top. The two smaller “chef’s treats” we made with the leftover dough tasted promising and we left the others to cool.
While I was doing that, Stephen started making up the bacon jam. It’s not a quick process but it isn’t complicated either. When the initial stages were complete, we had to wait two hours for it to reduce and for all the flavours to combine so we did the only thing we could have done in this situation: we went to the pub. When we came back, we removed the jam from the oven and left it to cool overnight. This afternoon, we completed the final blending step and then sat down for a spot of Sunday tea. The jam was very sweet but had a complex, smoky flavour from the chilli and the bourbon which complemented the sharp cheese scones very well. Not a traditional afternoon tea but an interesting, tasty one nonetheless.
Cheese Scones (very slightly adapted from Delia’s recipe in the Complete Cookery Course)
Makes about six scones
175g self-raising flour
1/2 tsp mustard powder
1/4 tsp salt
1/4 tsp paprika
25g butter
75g Cheddar cheese
1 egg
2 tbsps milk
Start by sieving together the flour, mustard powder, salt and paprika. Mix well.
Next, lightly rub in the butter using only your fingertips. Be careful not to over-work the mixture and stop when you have a crumby texture. Now add most of the cheese, leaving a little for the tops of the finished scones.
Mix together the egg and the milk and then tip that into the flour mixture. Work the liquid into the flour but again, use your fingertips and try to be light-handed. You want the final dough to be smooth but don’t knead the mixture as you would bread dough.
Roll the dough out on a floured surface to a thickness of about 3 cms. Cut the scones using a 4 cm cutter. You should be able to get six with a little leftover which you can form into a smaller scone but remember it will need less cooking time.
Lay the scones onto a buttered baking sheet, brush the tops with some milk, add the leftover cheese and sprinkle with a little paprika (this will go very dark though so you can leave this out if you wish) and then bake for 15 minutes at 220 degrees. I checked the scones at 15 minutes and they didn’t seem to be cooked so I put them back for another 3 minutes, the eating tells me I should have pulled them out at 15 minutes though. Test with a knife, they are cooked when the knife comes out clean.
Bacon Jam (from this blog)
Makes one jar
450g smoked, streaky bacon, cut into 1″ pieces
1 large onion, sliced
3 tbsps light brown sugar
3 cloves garlic, crushed
1/4 tsp allspice
1/4 tsp cinnamon
1/4 tsp nutmeg
Pinch ground cloves
1/2 tsp chilli powder
1/4 tsp smoked paprika
125ml strong coffee
60ml cider vinegar
125ml bourbon (we used Four Roses bourbon, a bottle of which was sent to us for cooking with some time ago but we didn’t get around to using)
60ml maple syrup
1 tablespoon chilli sauce
Start by cooking the bacon over a medium heat until it begins to brown. You want the edges to be crispy but you don’t want to cook all the fat out. Once cooked, remove the bacon from the pan and set aside on some kitchen paper to drain.
Remove most of the oil from the frying pan and then add the onions and the sugar. Cook over a medium heat until the onions have cooked right down and started to caramelise. Now add the garlic and spices and cook for about another five minutes.
Add all of the liquids and return the bacon to the pan. Bring to the boil and then reduce the heat and simmer for two hours, checking that there is enough liquid as it cooks.
Let the mixture cool and then blend to a jam-like consistency, don’t puree the mixture too much though, you want some distinct pieces of bacon left in there.


Roast Rib of Beef
We were out all day last Sunday and ended up in the pub in need of something to eat. When this happens I always avoid the Traditional Sunday Roast since I don’t think it’s ever as good as the real home-cooked version. For some reason, last Sunday I broke my golden rule and was rewarded with a plate of food that was edible but by no means remarkable. It gave me a craving for a proper Sunday lunch so this morning, Stephen went off in search of beef while I got on with the accompaniments.
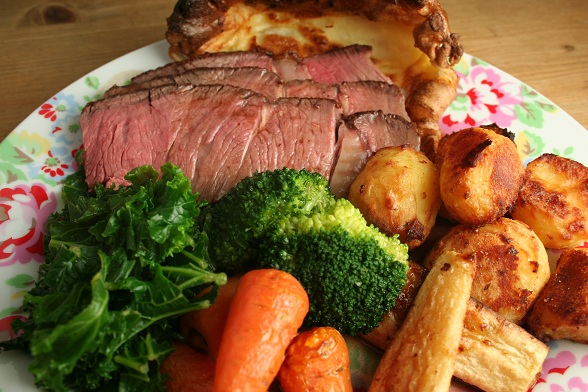
When he returned, he was clutching a large bag which contained a rib of beef, well two ribs actually. We followed Hugh’s instructions again but were taken by surprise at the speed the beef cooked which meant we ended up with meat that was just over the medium-rare we prefer. This was a tasty cut of beef though so the flavour wasn’t affected too much. We really must remember to pay more attention to the meat while it’s cooking though since this is a situation we find ourselves in all too often.
Great Yorkshire pudding (that wasn’t frozen like last week), crunchy roast potatoes, average parsnips and a decent selection of vegetables made for a good lunch. There was plenty of excellent gravy too, another bonus of eating at home and not a pub/restaurant.
The “This Week Last Year” plugin on the sidebar tells me that we ate roast beef exactly a year ago. A further search through the archives reveals that we haven’t had it since. Far too long.


Chicken Kiev with Mustard
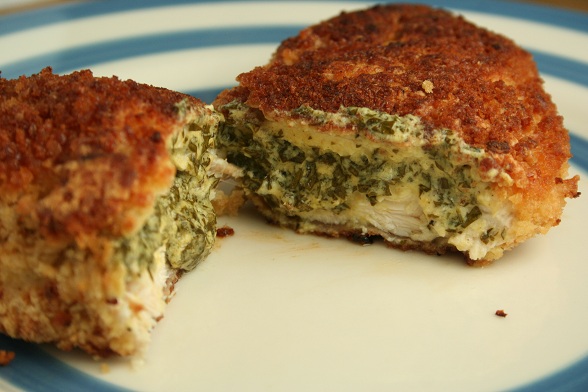
My obsession with mustard continues. As does it seems my obsession with breaded meat, especially for Friday night dinners. The two together obviously equal chicken kiev with a mustard-butter instead of the usual garlic. We were going to call this Chicken Dijon (since the chicken is stuffed with Dijon mustard) but that already exists and I couldn’t think of anything else. Not that it matters, what matters is that it was a good combination and the butter did a very good job of staying inside the chicken and not leaking all over the frying pan which is always good.
No lengthy recipe required, just stuff the chicken with the mustardy butter (I used about 2 tablespoons of mustard to about 3 tablespoons of butter along with some salt and pepper and some chopped parsley), roll the chicken in some seasoned flour, then beaten egg and finally some breadcrumbs. Add some olive oil to your frying pan, heat and then brown the chicken on both sides.
Transfer to the oven and cook for about 20 minutes or until the chicken is cooked. Serve with some kind of potato and vegetable – we ended up eating the salad I had prepared as a starter hence the rather lonely looking chicken up there.


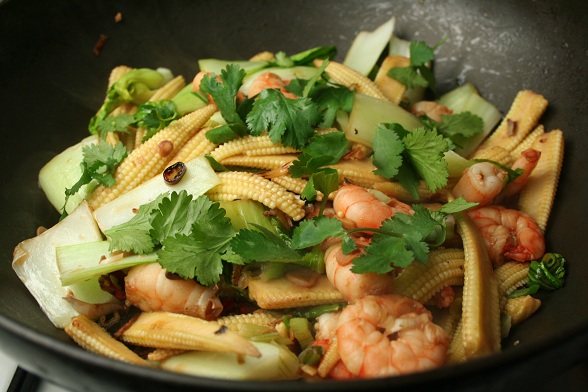
Thai Prawn Stir Fry
This was supposed to be mussels but when we came to clean said mussels, most of them were open. It was 7pm by this point so we quickly returned the mussels and exchanged them for some prawns. One of the major benefits of stir-frying is the speed at which the meal comes together so the fact that it was getting late wasn’t too much of a problem.
Our recent stir-fries have been a bit haphazard, basically throwing a bunch of ingredients into a pan and hoping for the best. They turn out fine, good even, but there’s nothing authentic about them so this time we tried to stick to a more Thai-style dish. This was also good and probably no better than our throw-it-all-in-and-hope-for-the-best efforts but at least we felt a little more authentic.
Thai Prawn Stir-Fry
Serves Two
2 spring onions, finely chopped
2 cloves garlic, finely chopped
1 red chilli, finely chopped
1 stalk lemongrass, finely chopped
200g prawns, shelled
Generous splash light soy sauce
Generous splash Thai fish sauce
Handful baby corn, sliced lengthwise
Handful pak choi, prepared and separated
Heat the oil in a wok over high heat. Add the spring onion, garlic, chilli and lemongrass. Stir fry for 1 minute. Add the prawns. Stir fry for 2 minutes. Add some soy sauce and fish sauce. Add the baby corn. Stir fry for 2 minutes. Add the pak choi. Stir fry for 1 minute. Add a dash of water and white wine and a little more soy sauce and fish sauce. Turn down the heat and cover, cooking for another 2 to 3 minutes. Stir in chopped coriander leaf and serve with rice or noodles.


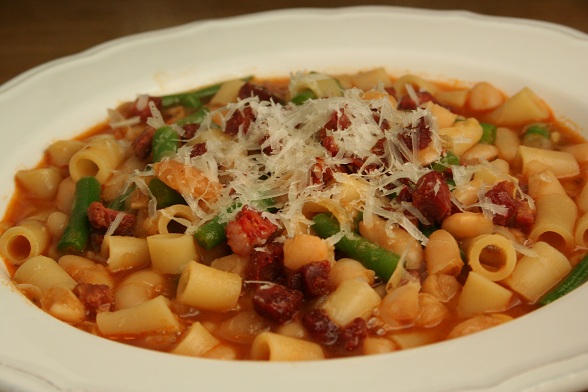
Pasta Fagioli
This started life as a potato and fennel soup but, somewhere along the way, pasta and beans became more appealing. Pasta and beans with chorizo. I’m sure the potato and fennel soup had potential but in a fight with chorizo there can only be one winner.
This was a pretty basic soup recipe to which I added some cooked pasta. I would have just thrown it into the soup towards the end of the cooking time but I wanted to use up the odd looking pasta that’s been hanging around for a while. I cooked it first and then sliced it up when it had cooled which was one of the most fun kitchen experiences I’ve had for a while. I love to chop and the way the knife sliced through that soft pasta was very rewarding. I’m tempted to buy another packet just so I can keep using it this way actually.
I also added some green beans which were left over from Friday night’s dinner and definitely past their best. They were fine in the soup though, as older vegetables mostly always are.
My top tip for this soup is to render the chorizo first and then add just half back to the soup. Reserve the other half for serving on top. Even with a short cooking time in liquid, the chorizo will leach most of it’s flavour leaving you with nicely textured but pretty tasteless chorizo. If you add half back when you serve (ensuring you’ve cooked plenty in the first place) then you’ll have fully flavoured liquid as well as tasty chorizo.
Pasta Fagioli
Serves Two (generously, i.e. with a small portion left over for lunch tomorrow)
150g dried cannelini beans
3 pints water
150g chorizo
Olive oil
1 onion, chopped
2 cloves garlic, crushed
2 bay leaves
Handful rosemary, chopped
1 tbsp tomato puree
Glass white wine
250ml vegetable stock
Salt
Parmesan cheese
Start by cooking the cannelini beans in a large saucepan. Today, these took about 1.5 hours but I find this varies so keep an eye on them and top up with water if you need to. You want the beans to be almost cooked but not so much that they are breaking down. A little more al-dente than you would serve pasta. Once cooked, leave the beans to cool in the cooking water.
In a frying pan, cook the chorizo until the fat has rendered. Remove to a plate lined with kitchen paper and blot to remove the excess oil.
Clean the pan with some more kitchen paper, add some olive oil and soften the onion, about five minutes. Then add the garlic, the bay leaves and rosemary and cook for another three minutes.
Next, add the tomato puree and stir until it is well incorporated. Add the wine and cook until the alcohol has evaporated.
Return half the chorizo to the pan, season with pepper.
Now, tip the contents of the frying pan into the saucepan with the beans and the water. Add the vegetable stock, bring to the boil and then simmer for about 30 minutes. After about 15 minutes, squash some of the beans with the back of a wooden spoon so that they break down. This will help to thicken the soup.
Season with salt and pepper and serve. Add the remaining chorizo and grate over some parmesan cheese.


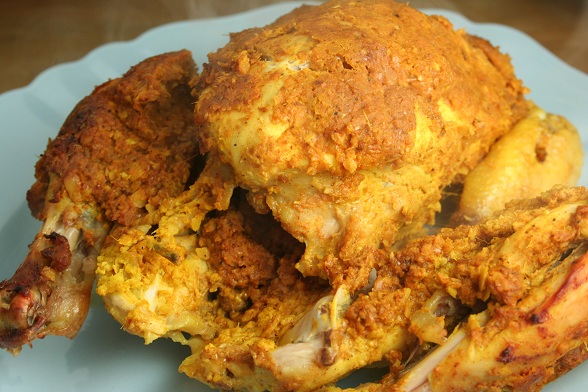
Indian Baked Whole Chicken aka Best Chicken Ever
I couldn’t get the title of the post to do justice to the meal, so had to add that bit on the end. The recipe is from Madhur Jaffrey’s “Indian Cookery” and the title in there doesn’t do it justice either; it is simply called “Whole Chicken Baked in Aluminium Foil”. On reading the recipe though, it becomes obvious that there is more to it than that – there is a marinating step and then some more spice paste is put onto the chicken before it is wrapped up and cooked.
We found the recipe in the morning while paging through our recipe books and when I saw that it required the whole chicken to be skinned, I was initially a bit worried that I would spend the whole afternoon in the kitchen trying to do it. But then serendipity – we were watching Saturday Kitchen and Atul Kochhar ended up doing exactly that! I didn’t skin it as quickly and effortlessly as he did, but at least I had an idea of the technique before starting, which helped a lot.
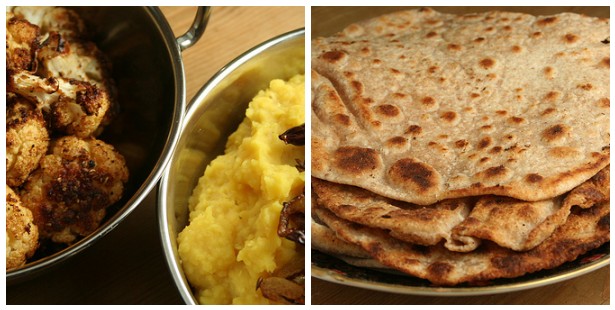
We had planned a few accompaniments too – dal, roasted cauliflower, braised cabbage and chapatis.
The chicken was brilliant. At one point I said something like “this is the best chicken I ever remember eating”. The depth of flavour was intense, but in a mellow and rounded way. The spice paste had cooked through and made an excellent sauce, along with having flavoured the chicken with its deep gingery, garlicky, spicy goodness. I can’t think of much more to write about it that will do it justice, but we will certainly be cooking this again when some friends are around to share the deliciousness.
Indian Baked Whole Chicken
Serves 4-6
Marinade
2.5cm ginger, chopped
2 cloves garlic, chopped
6 tbsps natural yoghurt
1 tsp turmeric
1 1/4 tsps salt
1 tsp cayenne pepper
Black pepper
1 chicken, skin removed
225g onions, chopped
4 cloves garlic, peeled
4cm ginger, chopped
25g slivered almonds
3 tsps cumin
3 tsps coriander
1 tsp turmeric
1 tbsp paprika
1/2 tsp cayenne pepper
1 1/2 tsps salt
Oil
2 tbsps lemon juice
Pepper
1/2 tsp garam masala
First make the marinade by blending all the ingredients together. Rub the marinade all over the chicken, including the inside, and set aside for two hours.
Meanwhile, blend the onions, garlic, ginger and almonds together into a paste. Add the cumin, coriander, turmeric, paprika, cayenne pepper and salt and blend again.
Put some oil into a frying pan and fry the paste over a medium-heat for 8-9 minutes. Add the lemon juice, pepper and garam masala and mix together. Leave the paste to cool and pre-heat the oven to 180 degrees.
Spread the cooled paste all over the chicken, including the insides and then wrap securely in foil. Bake, breast side up, for 90 minutes or until the chicken is tender.


