Breaded Veal with Asparagus and Sautéed Greens
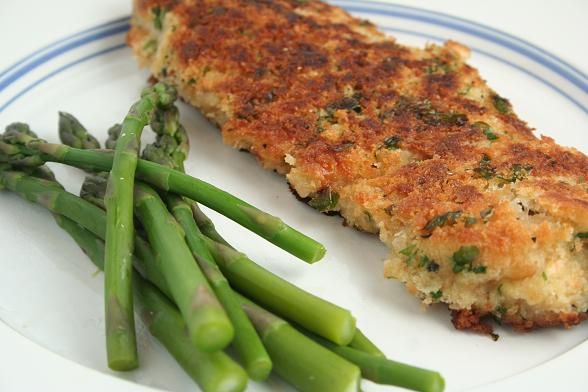
Veal can be a contentious issue amongst food-lovers. And then there are the animal-lovers to consider too of course, but they tend to be a bit one-sided on this issue. However, for those of us who both love food and prefer to eat only ethically produced food, we are lucky that we can now buy British “rosé” veal, which is pink in colour and means that the calves have not been confined to small containers all their lives or fed iron- and fibre-deficient diets.
For many years I’ve maintained that “happy food is tasty food”, so am glad to find happy veal is becoming more widely available. Why they feel the need to market it as “rosé” veal is beyond me though; perhaps they think that French-sounding names for food are more likely to sound sophisticated and appeal to people more, which is ironic seeing that the British veal calves are raised to a much higher standard of welfare than those elsewhere in Europe.
Anyway, all that aside, Kerri bought a couple of slices of happy veal for dinner today. We breaded and fried these and served them with asparagus and sautéed spring greens, all of which turned out really well. The recipe for the veal went something like this:
Ingredients:
2 happy, pink veal escalopes
2 cups breadcrumbs
1 egg
flour
parsely
1 tsp Dijon mustard
salt and pepper
olive oil for frying (1-2 tbsps)
Method:
Place some flour onto a plate. Beat the egg, season it with salt and pepper and then mix the mustard into it and place it onto another plate. Finely chop the parsley, then mix it into the breadcrumbs on a third plate and season the breadcrumbs with salt and pepper too.
Have a fourth, empty plate waiting (this recipe is heavy on plates if you hadn’t realised yet). Pat the veal escalopes dry with some kitchen towel, then dust them with the flour, patting off any excess. Then dredge them in the seasoned egg mixture and finally put them onto the breadcrumb plate, coating them well with the crumbs and pressing the crumbs well into it to make them stick. Then set aside on the empty plate.
Heat some oil in a frying pan over medium heat and when it is hot, add the breaded escalopes. Fry for 2-3 minutes on one side, then turn over and cook on the other side for the same amount of time. You might need to add a little more oil when turning them over if all the initial oil has been absorbed into the crumbs.
Then eat them. We found these really delicious. The seasoned crumbs and mustard complemented the veal perfectly and the taste of the veal was strong enough to stand up to the flavours, which we were initially worried up. As mentioned above, we served them with simply steamed asparagus and some spring greens that were shredded and sautéed in butter and garlic.


Teriyaki Steak with Pea Shoot Salad
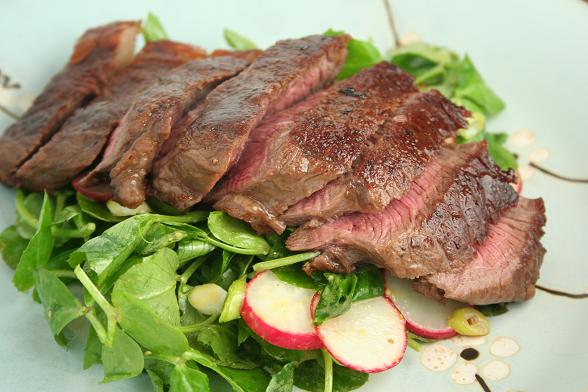
We’d originally planned a Thai-style stir fry for this evening but I couldn’t muster up much enthusiasm for it. I came across an idea for this dish while browsing online and was instantly more excited, not least because it included pea shoots. We haven’t cooked with them much before, bar one failed attempt to recreate a restaurant-style dish and using new ingredients is always much more fun than relying on tried and tested favourites.
We were both really pleased with how this turned out: the combination of mirin and soy sauce providing a really rich, earthy flavour while the mustard dressing lightened and lifted the whole dish. The delicate pea shoot flavour was a bit lost really but was definitely better than something like rocket which would have been too peppery, or general salad leaves which would have been lost even more.
Two steaks
1.5tbsp mirin
1.5tbsp Japanese soy sauce
1.5tbsp sake
2tbsp vegetable oil
Bag of peashoots
Four radishes, sliced
Two spring onions, sliced
1tsp English mustard
1tsp wholegrain mustard
½tsp sugar
1tsp wine vinegar
1tbsp vegetable oil
1tbsp water
Whisk the mirin, soy sauce and sake together.
Fry the steaks for 2-3 minutes per side. Remove from the pan and rest.
Pour off excess fat from the frying pan, then add the mirin, sake and soy sauce mixture. Bring to the boil and simmer for 2-3 minutes, until thick.
Return the steaks to the frying pan and cook for a further minute, continuously spooning the sauce over the steaks.
Mix the salad, combine the dressing, dress the salad, add the steak and serve.


Asparagus and Pancetta Risotto
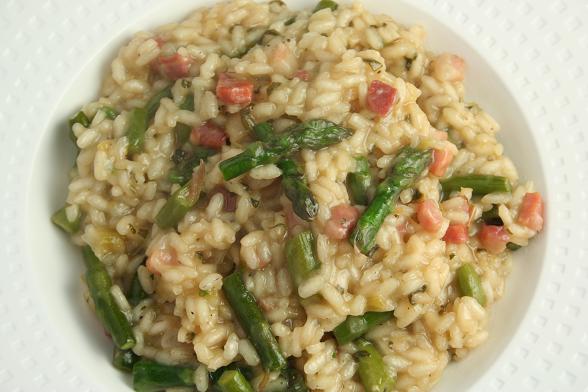
Kerri and I were discussing risotto and she suggested putting asparagus into it, after which I suggested pairing the asparagus with chorizo. We do have rather a lot of pancetta and lardons in our rather small freezer though, so it made sense to use up one of those instead.
We started off in the usual way by softening some finely chopped onion, celery and garlic in olive oil, with the exception that we added the chopped pancetta too. Once this had had a few minutes, in went the rice for a while, stirring so that it didn’t stick, and then some wine and the first ladle of stock. Once the second ladle of stock had gone in, we added quite a lot of chopped sage. Later we added the chopped up asparagus stalks, and right near the end we added the asparagus tips and finally some pepper and a large handful of grated parmesan.
The result was really good – rich in flavour and creamy, but with defined texture still left in the rice grains. The stock that we used was home made chicken stock which we had made a while ago and frozen, which made a big difference but sadly that is all used up now. The sage was noticeable but melded into the background nicely.
We drank a South African Chardonnay with it, which was rich enough to stand up to the rich stock and parmesan and it also had a toasty note to it which would have really brilliantly with the risotto had we used smoked bacon in it.


Chorizo and Squid Salad
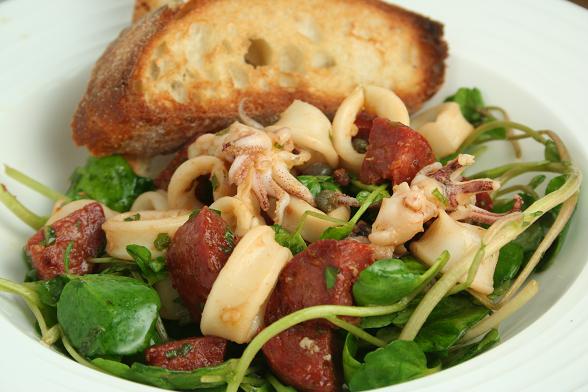
The friends that came to visit yesterday kindly bought an enormous chorizo with them. We ate some yesterday but had plenty left over so decided to use it in this salad that we originally saw on Something For The Weekend. It was really good, the capers and sherry vinegar cut through the oiliness of the chorizo really well.


Honey and Lemon Cake with Pistachios
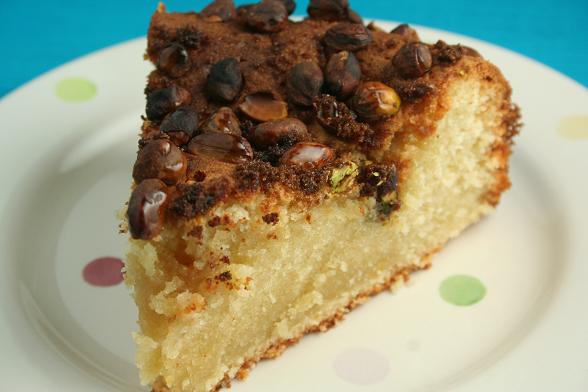
The weather has been pretty miserable today and an afternoon in the kitchen seemed like the best way to make use of the Bank Holiday. I first tasted this cake a couple of weeks ago and have been eagerly awaiting the recipe ever since, luckily it turned up just in time.
280g unsalted butter, softened
Rind of 1 lemon, grated
440g golden caster sugar
6 eggs, beaten
170g sour cream
300g plain flour
35g self raising flour
1tsp baking powder
Juice of 1 lemon
80g pistachio nuts (original recipe stated pine nuts)
1tbsp demerara sugar
90g honey
Preheat oven to 170 degrees.
In a large mixing bowl, beat butter, lemon rind and sugar together until soft. Slowly add the beaten eggs ensuring that each addition is incorporated before adding more.
Stir in the sour cream.
In a separate bowl, combine plain flour, self raising flour and baking powder and add this a tablespoon at a time to the large mixing bowl.
Add the lemon juice and continue to mix until incorporated.
Transfer the cake mixture to a large, greased tin and bake in the oven for 15 minutes.
While the cake is baking, toast some pistachio nuts and leave to cool. Mix the cooled nuts together with the demerara sugar and set aside.
When the cake has cooked for the initial 15 minutes, remove from the oven and gently press in the nut and sugar mixture.
Bake for a further 45 minutes.
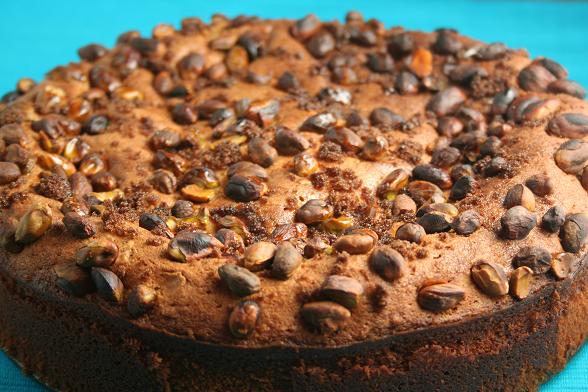
I had some trouble pushing the nut and sugar mixture down into the cake which meant that the nuts went rather brown. I’m not sure how to avoid this next time, perhaps add them later on. I don’t think the sugar was all that necessary either although I did use dark sugar rather than demerara which didn’t melt in the same way demerara would have done. My version was darker than the one I ate recently too which may be due to our oven.
It’s a good tasting cake though and the dampness means that it’s quite forgiving, even with our dodgy oven, it still didn’t dry out.
Remove cake from the oven and drizzle with the honey.


Pulled Pork
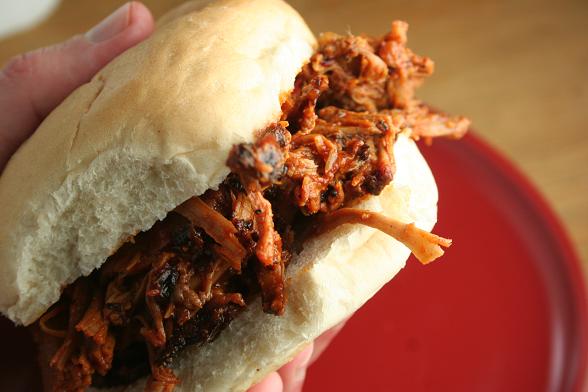
This has been on our list of barbecue plans for quite a while now. We did some research, invited some friends round, bought a pork shoulder and got to work.
Pulled pork is traditional in some southern American states and the idea is that it is a slow-cooked pork shoulder that becomes so tender during its long, slow cooking that it can easily be pulled apart with a couple of forks and doesn’t need to be sliced. These “pulled” bits are traditionally mixed with a sauce and then served on a white roll to make a “pulled pork sandwich” which often also includes slaw. The pork is rubbed with a spice mixture before cooking to give it a bit of heat and flavour, and can be smoked when cooking.
These were the spices for our spice mixture, before being mixed together:
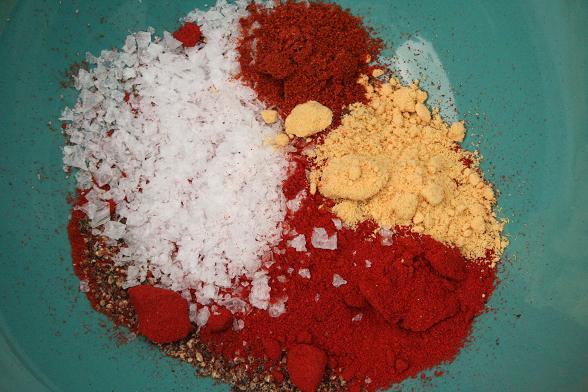
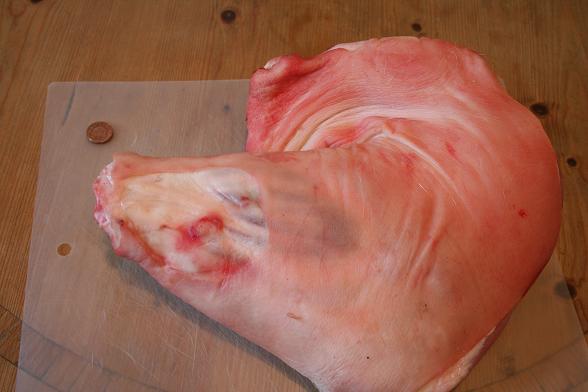
Being an American speciality, the recipes call for “pork butt” which is an American cut comprising the top part of the shoulder. We ended up with a whole shoulder though and just decided to cook the whole thing. So the day before, we skinned it and removed the fat cap and then rubbed it all over with a spice rub. (This skin became crackling with we served with seared scallops that night) We didn’t have a freezer bag big enough for the shoulder, so we wrapped it in cling film and put it into the fridge overnight for the rub to penetrate the meat.
Before begin rubbed, with a penny for size comparison:
In the morning, we popped it into the oven on a low temperature (140C) for about four hours before putting it onto the barbecue. This, the actual cooking of it, was the bit I was worried about, with regards to timings and temperatures, etc. Some recipes said to cook it in the oven covered, others said uncovered and of course there were the ones on the barbecue which interested us, but a lot of these were for special smokers and/or recommended using a remote thermometer to monitor the internal temperature. However, we needed a combination of these as in order to have it ready for 2pm, we needed to start quite early in the morning and didn’t think our neighbours would appreciate being greeted by barbecue smoke shortly after waking up. Also, very boringly, we had washing on the line that needed to dry and we didn’t want that to smell like barbecue.
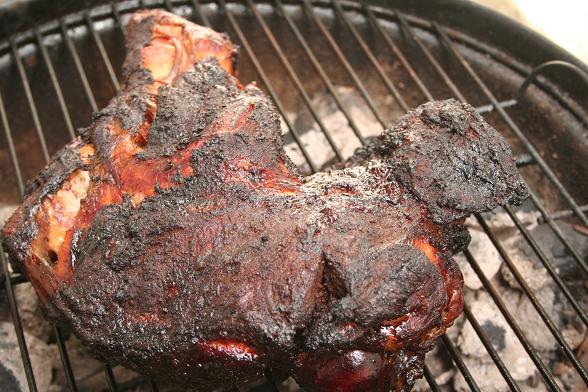
So we started with it in the oven, covered, for four hours, and then planned to put it onto the barbecue with some wood chips and smoke it with the lid on for a further hour. However, it was still quite far from being done when we took it out of the oven and it needed at least two hours on the barbecue, during which time it become a little charred on the outside – too much heat. The result was that although some of it was easily to “pull” apart, other bits weren’t, but it tasted good, which is the main point. It did mean that our friends had to wait a bit for their lunch, but Kerri had made a large bowl of very good guacamole which we ate with corn chips while we waited.
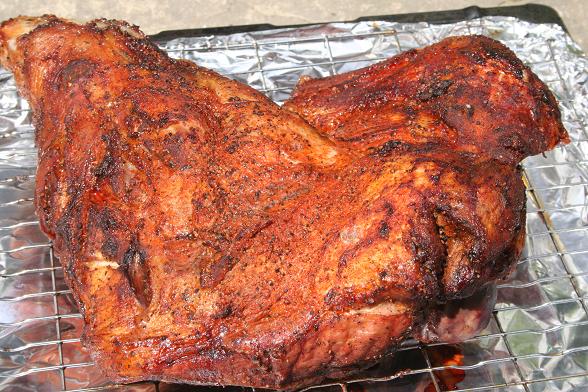
Just out of the oven:
And on the barbecue, a little blacker than planned:
Then pulled and ready to be made into a sandwich:
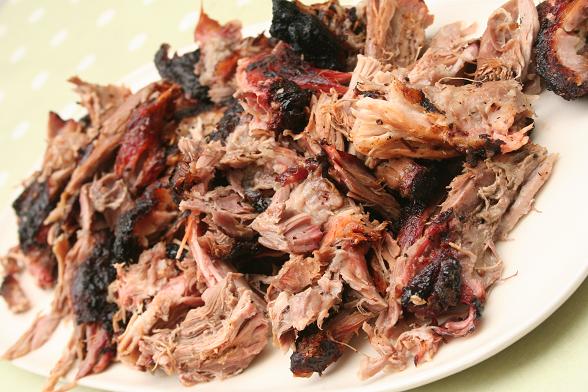
Now there was the sauce to consider. There are two main schools of thought on this, which is mostly down to regionality – some people use a spicy, vinegar-based sauce whereas others use a sweeter, tomato-based sauce. We went for a simple vinegar-based sauce which we warmed up in a saucepan and added the shreds of pork to – it worked really well, moistening and adding flavour to the pork. We also made slaw, which was very simple to make and a good addition to the sandwich.
Also barbecued corn:
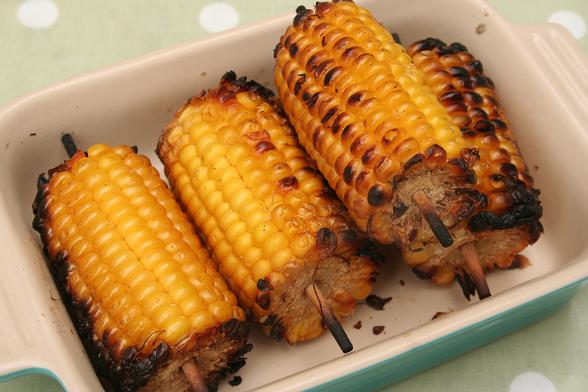
It tasted rather good and was successful in that department, but didn’t turn out quite as we’d hoped overall. We’ll just have to try again and try to perfect it!


Mint Juleps

While waiting for our pulled pork to cook, mint juleps seemed like a good drink to make, given that they are from a similar geographical area and also seeing as we had loads of rampantly growing mint. They are traditionally served at the Kentucky Derby, in silvery Julep cups, but we made do with highball glasses given the deplorable lack of Julep cups in our household.
The recipe is very simple:
2 tablespoons simple syrup*
90ml Bourbon
3 large mint sprigs for garnish
crushed ice
Pour the simple syrup into a Julep cup (or other suitable container, e.g. a glass) filled with crushed ice. Stir well, then add the bourbon and stir until a film of ice forms on the exterior of the cup. Garnish with mint sprigs.
Some recipes say to crush / muddle the mint, which we did afterwards to get a little more minty flavour and enjoyed it more than before crushing. It makes it a bit like a bourbon-based mojito. I ended up making simple syrup with golden caster sugar and the result was a dark brown syrup rather than the clear one that results from making it with white sugar. It made the drink look darker than it usually is, but I thought it looked pretty good. A little too sweet for our tastes though; if I make them again I’ll use less sugar syrup.
* to make this, simply take equal measures of water and sugar and heat and stir until all the sugar is dissolved, then leave it to cool before using


Scallops with Truffle Sauce and Crackling, and Herb-Crusted Rack of Lamb
Every now and then, we decide to cook something special just for ourselves and lay the table properly and almost pretend that we’re eating out, except of course for the fact that we’re cooking the food ourselves. It makes it a bit more special in many ways, but it does make photography a little more difficult having the table set with things that get in the way. Doing this is also a good excuse to cook scallops.
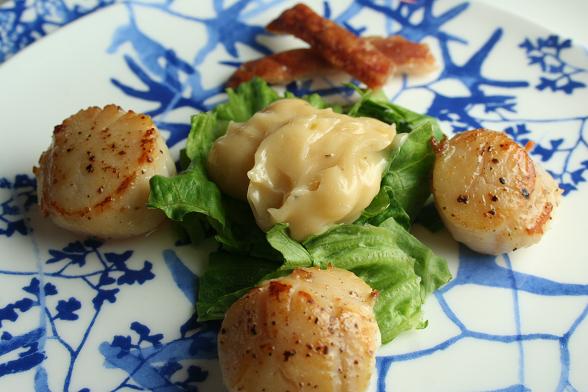
So… the starter was of course scallops. Kerri had found a “salad of truffle-dressed scallops” recipe by Gordon Ramsay, which we stole the dressing from. The dressing emulsified really thickly, becoming almost like a truffle mayonnaise. The scallops themselves we just seasoned and pan-fried quickly as usual. The interesting bit of this dish was pork crackling, which was an afterthought of Kerri’s that worked really well. We had rather a lot of pig skin left over from skinning a shoulder (for a recipe today…), we decided it would be a crime not to put it to good use and make it into crackling. The crackling did go well with the scallops; many pork-related things go well with scallops… chorizo, black pudding, pork belly and now crackling.
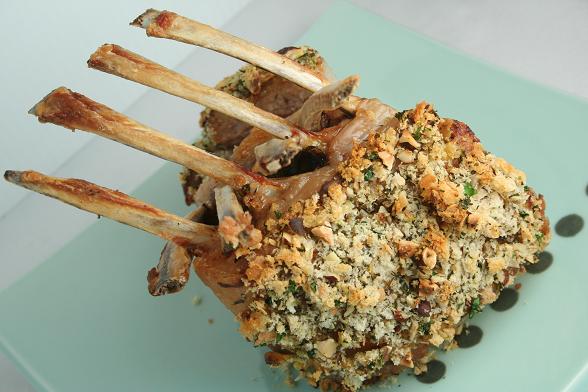
We had a lovely rack of Dorset lamb, which we cooked with a herb crust, which looked really good presented as a half guard of honour. We seared the lamb fat side down for a few minutes, then on the other side for a bit, then coated the fat side with Dijon mustard. We made the crust by adding chopped parsley, thyme, hazelnuts and garlic to breadcrumbs (salt and pepper too of course) and then pressing this into the mustard. This went into the oven for almost 20 minutes, then rested for a few while we sauteed some spring greens in garlic butter. The lamb turned out brilliantly. We were concerned that if we didn’t eat the fat, then we wouldn’t get any of the crust, but ended up scraping the crust off the fat bits and eating it with the meat and it was very tasty indeed. Served with the aforementioned spring greens and sauteed potatoes.
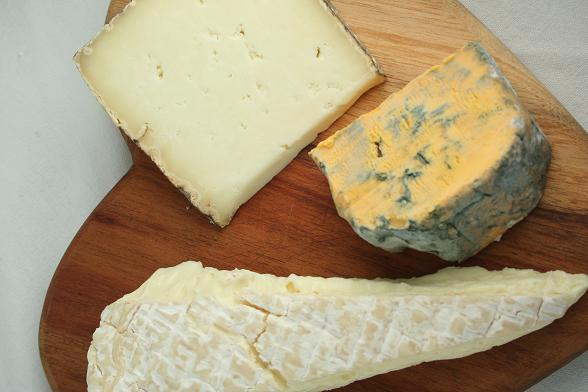
After this we found a little space for some cheese. A lovely ripe, earthy Brie, a delicious ewe’s milk cheese from Swaledale and Blacksticks Blue (which was a little old as we’ve had it for a while now). It struck me how the ewe’s milk cheese, tasted a little like roast lamb – I suppose the fattiness in the milk is quite similar to actual sheep fat.


Steak with Asparagus and Cherry Tomatoes
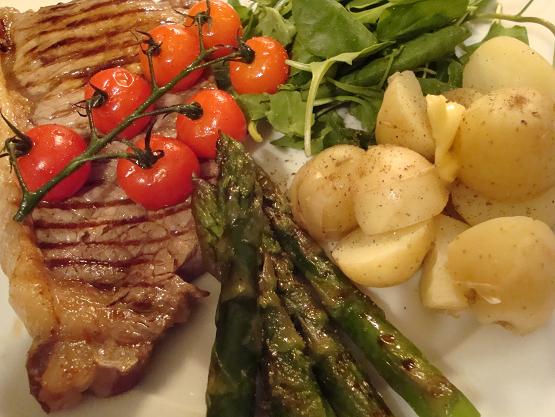
This evening, Kerri and I went to my sister’s to babysit for them while they went out for her birthday. As a thank you, they bought us some ingredients to make dinner with while we were babysitting: some rather nice steak from their local butcher, cherry tomatoes, asparagus and new potatoes.
We ended up cooking most things on the griddle pan – first the cherry tomatoes, then the steak and while the steak was resting, we finished off the previously blanched asparagus on the griddle too. The potatoes were of course just boiled rather then griddled.
It all turned out rather well except for the asparagus which we’d overcooked a bit.


Spaghetti with Salsa Romesco
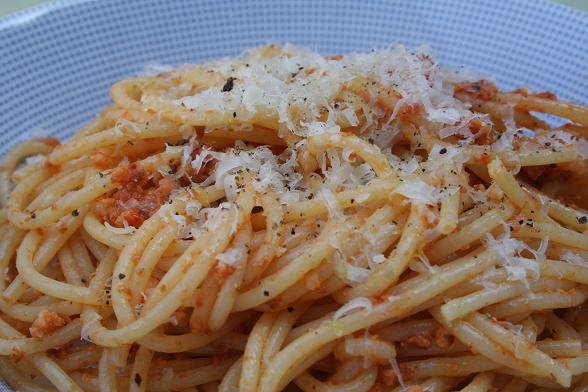
As Stephen mentioned yesterday, I made rather a lot of romesco sauce to go with our swordfish and thought it would make a good lunch with some spaghetti. The flavours worked very well but the actual ‘sauce’ was too dry really. It’s given me an idea for a fresh sauce made with similar flavours though so not all was lost.


